Samsung Laser Printers – Using the Samsung Mobile Print App (Android)
Learn how to set up, configure and use the Samsung Mobile Print app for Android with a Samsung printer.
Download the app and connect the printer to the app
1. Make sure the printer supports mobile printing using the Samsung Mobile Print app. See the Supported Printers section.
2. Configure the connection.
- For USB connections, connect the USB cable to the printer, install the printer driver, then add/share the printer on the PC (this MUST be done before downloading the app).
- For network connections, connect the network cable, make sure the printer is configured to print over a network connection (print server, shared network, or Wi-Fi), and then print a test page.
3. Download the Samsung Mobile Print app for Android 4.0 or later.
4. Add the printer to the printer list.
USB connections a. Öffnen Sie die App “Samsung Mobile Print”.
a. Open the Samsung Mobile Print app.
b. Select the Add device manually option.
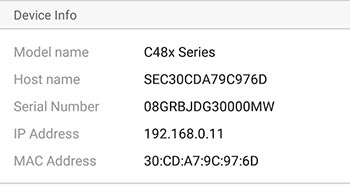
c. Select SMB as the connection type, enter the printer’s IP address, and then enter the user account.
d. Make sure the USB cable is connected, then tap Search to find and add the printer.
e. Print a test page (Print > Document).
Network Connections
a. If you are using a network connection, make sure the printer and phone are connected to the same network (same router).
b. Open the Samsung Mobile Print app .
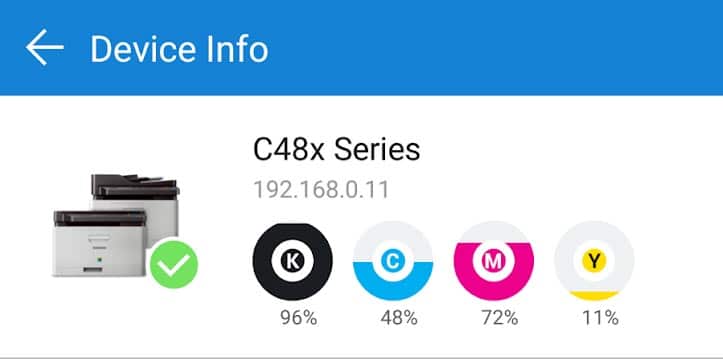
c. Tap Select Device or, to change an existing printer selection, tap the Add icon.
d. Select RAW as the connection type, enter the printer’s IP address and keep the default selection of 9100 port number.
e. Tap Search to find and add the printer.
Print, scan, or fax using the Samsung Mobile Print app (Android)
Follow these steps to print, scan, or fax using the Samsung Mobile Print app for Android.
NOTE: The maximum print or scan size varies depending on the media type supported by the printer.
Printing with the Samsung Mobile Print app (Android)
Follow the steps below to print using the Samsung Mobile Print app for Android.
1. Make sure the printer and phone are connected to the same network (same router).
2. Open the Samsung Mobile Print app and navigate to the Print tab.
3. Tap the Print icon.
4. If no device is selected, tap Select Device, and then select the printer from the device list.
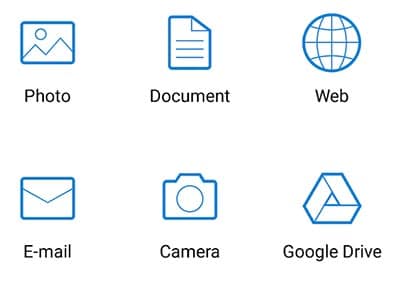
5. Choose an option like Photo or Document.
6. To print a photo, select an album and then select the image.
7. To preview the image or change settings, tap Preview.
8. To edit an image or change settings, use the icons at the top of the preview window.
9. Tap Print.
Scanning with the Samsung Mobile Print app (Android)
If you use the Samsung Mobile Print app for Android, you can scan using either the printer or the phone camera.
Scanning with the printer
Follow these steps to scan from the printer using the Samsung Mobile Print app for Android.
1. Make sure the phone and printer are connected to the same network.
2. Open the Samsung Mobile Print app and navigate to the Scan tab.
3. If no device is selected, tap Select Device, and then select the printer from the device list.
4. Tap the Scan icon.
5. Place the paper(s) on the flatbed/ADF to scan.
6. To preview the image, tap Preview.
7. To edit the image or change settings, use the icons at the top of the preview window.
8. Tap Scan.
9. Follow the on-screen instructions and tap Yes when Scan More appears.
After the scan completes, you can also do one or more of the following:
- View the scan in the list of saved scan files
- Share the scanned file with others
- Start a new scan
- Ending the scan
Scanning with the phone camera
Follow these steps to scan using the phone camera and Samsung Mobile Print for Android app.
1. Make sure the phone and printer are connected to the same network.
2. Open the Samsung Mobile Print app and navigate to the Scan tab.
3. If no device is selected, tap Select Device, and then select the printer from the device list.
4. Tap the Camera Scan icon.
5. Tap Camera to take a photo.
6. To edit or rotate the photo, tap the Auto Edit icon.
7. When you’re done, tap the Auto Edit icon again.
8. On the Send Camera Scan page, tap Send to see more options.
9. Tap one of the following options, swipe for more options, or stop scanning:
- asy sharing
- Fax
- Press
Faxing with the Samsung Mobile Print app (Android)
To fax using the Samsung Mobile Print app for Android, follow these steps.
1. Make sure the phone and printer are connected to the same network.
2. Open the Samsung Mobile Print app and navigate to the Fax tab.
3. Tap the Contact icon.
4. Select a document from the Documents list.
5. Tap the fax number in the footer, enter the fax number manually (or select an existing contact with a fax number), and then tap OK.
6. Select the printer. If no device is selected, tap Select Device, and then select the printer from the device list.
7. To preview the image or change the settings, tap Preview.
8. Make sure the fax cable is connected to the printer.
9. When you’re ready to send, tap Fax.