Configuring Wi-Fi Settings Using Samsung Printer Diagnostics
Configuring WI-Fi Settings
Configure the printer’s Wi-Fi settings using a direct Wi-Fi connection between your computer and the printer. This will connect your computer to the printer wirelessly. The Internet connection may be lost while configuring the printer’s Wi-Fi settings.
There are two methods to configure Wi-Fi settings. One uses a direct wireless connection and the other uses a USB cable connection. SPD first runs the direct wireless connection method. The USB cable route works if the printer does not support the WWS function or if the direct WiFi connection method fails
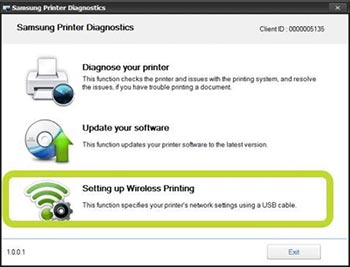

Setting up wireless printing
Configure the wireless settings for the printer by selecting Setup Wireless Printing from the SPD main screen.
Turn on the printer
This screen reminds you to turn on the printer.
Search for a device
This screen is displayed while the SPD application checks whether the printer supports the WWS function.
The “Select a wireless printer” screen appears if the printer supports the WWS function and more than one wireless printer is detected.
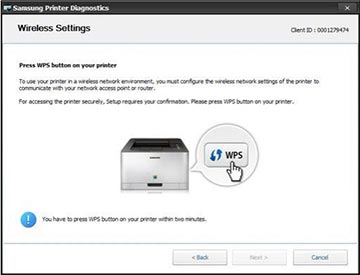
Press the WPS button
This screen verifies that the selected printer is the printer you want. When you click the printer’s WPS button, the software automatically proceeds to the next step. If you do not click the printer’s WPS button within 2 minutes, a Retry button will appear.
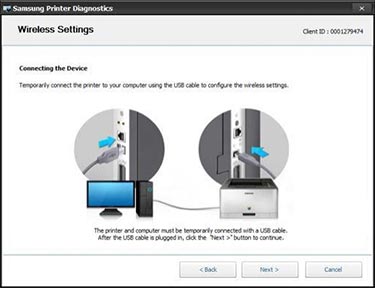
Connecting the device
This screen appears if the printer does not support the WWS function or if the direct wireless connection method failed. You will be asked to connect a USB cable. The method via a USB cable starts automatically.

Select the wireless network
This screen lists the wireless networks accessed by the connected printer. Only wireless networks in infrastructure mode are detected. When a user clicks the Refresh button, the wireless networks are listed again.
Wireless network security
The Wireless Network Security screen appears if the selected wireless network is a secured network.
If the security of the selected wireless network is WEP, the installer enables the Next button when a user enters a 5, 10, 13, or 26 character network password.
If the security is WPA and the user enters a key with more than 8 characters and less than 63 characters, the installer activates the Next button.
Connect wireless network
This screen appears while the application is trying to connect your printer to the wireless network.
Wireless network setting completed
This screen displays the Wi-Fi settings information (if the Wi-Fi setup was successful).
Connection error screen
The Connection Error screen appears when the printer cannot connect to the wireless network. This can occur for the following reasons:

- Connection Error – Network Not Found: Appears when the printer cannot find the wireless network.
- Connection Error – Computer Connection Error: appears when the printer was successfully connected to the wireless network, but the PC was unable to connect to the printer over the wireless network. This page displays the printer’s Wi-Fi setting information: the network name and IP address information.
- Connection Error – Invalid Network Security: appears when the network key for the wireless network is invalid.
- Connection Error – Connected to Wired Network: appears when an Ethernet cable is connected to the printer.
- Connection Error – IP Address Not Assigned: Displayed when an IP address could not be assigned to the printer.
- Connection Error – General connection error: appears when a timeout or an undefined error occurs.

