Use Samsung Printer Experience
Samsung Printer Experience is an application from Samsung that brings together Samsung’s device settings and device management in one place. You can configure device settings, order supplies, open troubleshooting guides, visit the Samsung website, and check information about connected devices. This application is automatically downloaded from the Windows Store when the device is connected to a computer with an Internet connection.
Understanding the Samsung Printer Experience
To open the application, select the Samsung Printer Experience tile on the home screen.
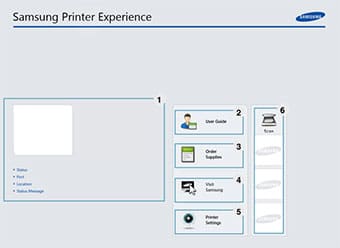
The Samsung Printer Experience interface includes several useful features described in the following table:
Add/Delete Printers
If you have not added a printer to Samsung Printer Experience or if you want to add/delete a printer, follow the instructions below.
Adding a printer
1. Select Settings from the Charms bar.
Or right-click on the Samsung Printer Experience page and select Settings.
2. Select Add Printer.
3. Select the printer you want to add.
You can see the added printer.
Solving a printer
1. Select Settings from the Charms bar.
Or right-click on the Samsung Printer Experience page and select Settings.
2. Select Remove Printer.
3. Select the printer you want to delete.
4. Click Yes.
You can see the deleted printer is removed from the screen.
Print from Windows 8
This section explains common printing tasks from the Home screen.
Basic Printing
1. Open the document you want to print.
2. Select Devices from the Charms bar.
3. Select your printer from the list
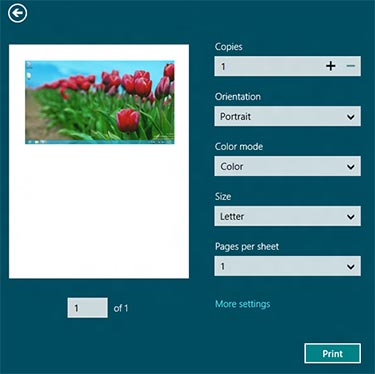
4. Select printer settings such as: B. the number of copies and the orientation.
5. Click the Print button to start the print job.
Cancel a print job
If the print job is waiting in the print queue or print spooler, cancel the job as follows:
- You can access this window by simply double-clicking the device icon () on the Windows taskbar.
- You can also cancel the current job by pressing the (Cancel or Stop/Clear) button on the control panel.
Open additional settings
You can set up additional printing parameters.
1. Open the document you want to print.
2. Select Devices from the Charms bar.
3. Select your printer from the list
4. Click More Settings.
Basic tab
Basic
This option allows you to select basic printing settings such as copies, orientation, and document type.
Eco Settings
allows you to select multiple pages per page to save media.
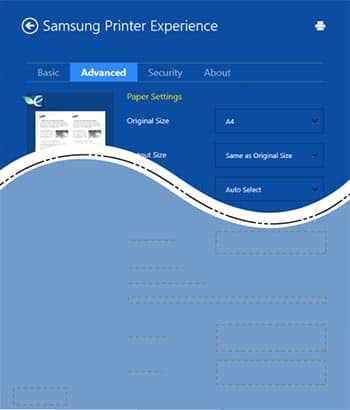
Advanced tab
Paper Settings
This option allows you to set basic paper handling specifications.
Layout Settings
With this option you can set the various options for the layout of your documents.
Security tab
Accounting
This option allows you to print with the permission given.
Confidential Print
This option is used to print confidential documents. You must enter a password to print with it.
Using the sharing feature
Samsung Printer Experience allows you to print from other applications installed on your computer using the sharing feature.
1. Select the content you want to print from another application.
2. From the Charms bar, select Sharing > Samsung Printer Experience.
3. Select the printer settings, e.g. B. the number of copies and the orientation.
4. Click the Print button to start the print job.
Scan from Windows 8
When you scan with your device, you can convert images and text into digital files that can be saved on your computer.
Scanning from Samsung Printer Experience
The most commonly used print menus are displayed for quick scanning.
1. Place a single document face down on the scanner glass, or place documents face up in the document feeder.
2. Click the Samsung Printer Experience tile on the home screen.
3. Click Scan.
4. Set scanning parameters such as image type, document size and resolution.
5. Click Prescan to check the image.
6. Adjust the pre-scanned image with scanning operation functions such as rotate and mirror.
7. Click Scan and save the image.